Back To Basics: Aperture and Depth of Field
8 35 Share TweetGet control over your aperture and you can be more creative, plus, how aperture affects photographies most common misconception, bokeh.

In my last Back to Basics, I told a little fib. It was a white lie, I didn’t want to confuse.
Yes, the trilogy of film speed, aperture and shutter speed can all be adjusted in different configurations, and yes, if you get the maths right, they will bring balance and a perfectly exposed negative (to see what I’m talking about, click here). However, the result will not always be the same, the picture will be affected.
Your lens and its aperture will change the image with the aperture set at different f-stops. Generally, when you select your f-stop, you are opening up the aperture to let more light in, (eg. in a darker environment. You may have reached the lowest shutter speed possible without getting shake so you lower the f-stop and open up the aperture).
The side effect you will notice in the eventual picture, is you are dramatically reducing your depth of field.
Your camera is only perfectly focussed at one, narrow point in the distance. However there is a range of ‘acceptable’ focus near and far from that point. This acceptable range is depth of field. Put simply, a lower aperture value, f1.4, f1.8 has a very narrow depth of field. f22 has a very big depth of field.
Knowing this allows you to consider the effect and put it to some use. If you want to make an object the focal point of a picture, and blur the background, choose a faster shutter speed and open that aperture wide. This suits still life and portraits.

Conversely if you are shooting a landscape and want as much as possible to be in focus, then close down that aperture and you’ll get almost to infinity in focus.

There is a rule of thumb that says depth of field is 1/3 in front of the exact point of focus, and 2/3 behind. If this is the case, then those with a zone focus camera (Olympus Trip 35, LCA etc) can, with a wider depth of field risk over-guessing distance rather than under-guessing.
These are good tips for all you lomographers with cameras that allow you to change these settings, things like the Lubitel, the original LCA, perhaps the Smenas too. But it’s really useful for SLR users, for the Zenits the Prakticas…

Before I finish this months Back to Basics I want to talk about the mightily misconstrued Bokeh. Bokeh is not the shape of points of light visible in an image, it “is the blur, or the aesthetic quality of the blur, in out-of-focus areas of an image.”


Common theory dictates this should be soft, and not distract you from the in-focus part of the image, but that sounds like a rule to me, and rules are meant to be broken.

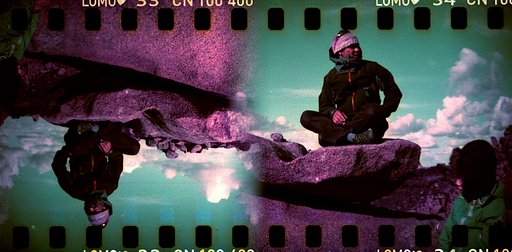
One of my favourite lenses is a 35mm wide lens for my Praktica. This has a cheap 5 blade aperture. When I shoot with a wide aperture, it becomes very, very obvious in the ‘not’ bokeh in the background. You can distinctly see one big pentagon in this photo, which is distracting and undesirable. If this rule is the truth, then why is this my most popular photo, ever?

Next month we look at Filters, how they can improve your black and white photography and what they do to colour film!
For more info, check out these Depth of Field, Dumetier, and Bokeh on Wikipedia
Back to Basics is a monthly Tipster series by Adam Griffiths where he seeks to impart a little more technical film photography knowledge. For each installment, he chooses a fundamental subject and explains it quickly and in simple terms (with examples where possible).
geschrieben von adam_g2000 am 2012-05-15 in #Ausrüstung #Anleitungen #slr #camera #blur #aperture #speed #bokeh #tipster #depth-of-field #narrow #shutter #f-stop #back-to-basics


8 Kommentare