How to Use Colovir Toners and Dyes on Black & White Prints and Negatives
3 15 Share TweetColorvir is a multifaceted toning/dyeing process which can be used on all types of B&W negative and darkroom-produced B&W Print. The colorvir process creates wild colours and special effects, and thus, is an experimenters dream. It can be hard to get hold of the chemicals now, but if you can get your hands on them, then the possibilities are endless.
With Colovir, no too prints are ever exactly the same. That being said, if you take careful notes when you are working through the process, you will be able to reproduce similar results time and again, though not identical.
These chemicals are only for use on black and white darkroom printing papers. It will not work on other types of prints. Also, the better printed your image (with a good range of tonal values, etc.), the better toned your final print will be. Any black and white negatives can be toned and dyed, just double the concentrations of the baths when toning/dying negatives.
The best way to find out what these chemicals do is by experimenting with them. As you can never say definitively just how every processes will turn out. The final image will depend on a lot of variables. The main four being: The time the print spends in each solution, the strength of the solution, the order in which each solution is used, and the number of processes used on the print.
The Colorvir Chemicals can be bought from a few places on the internet, but be aware, the mixing manual does not come with the kits any more! I will be giving out the all the chemical mixing charts you need in the tipster, but if you can get your hands on the manual, its worth the effort. The original Colovir Manual has extra hints, tips, and suggestions of things to try out.
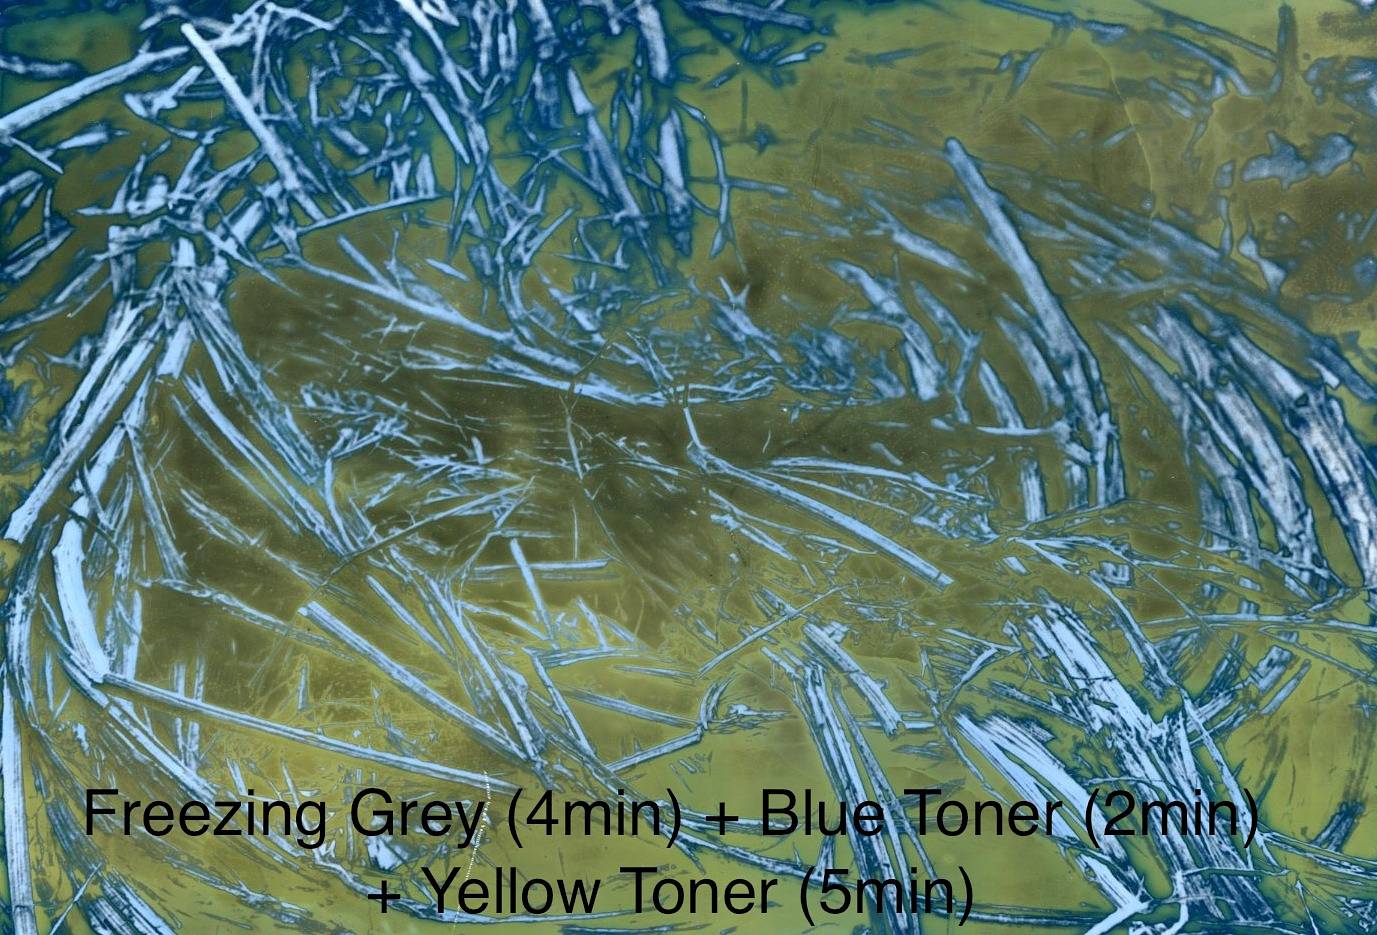
The following images are ones I have done as tests, they are all on Multigrade Resin Coated paper, the images themselves are some of my old a-level negs that I reprinted. These are just some of the combinations which can be achieved.


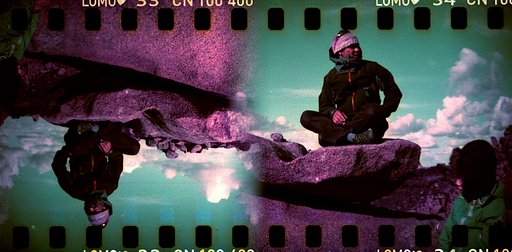
The next two images are two random Ilford HP5 B&W negs, left in the darkroom at work, that I played around with, they were in the same baths as the prints so the effects are very weak, but it shows some possibilities.


HEALTH AND SAFETY PRECAUTIONS:
These chemicals are HAZARDOUS! Respect them. They are mild skin irritants, serious eye irritants, and are poisonous by ingestion.
- Use in a well ventilated area.
- Wear latex/nitrile/vinyl gloves and use tongs to handle the prints.
- Tie back hair, roll up sleeves and wear an apron.
- I recommend wearing glasses or goggles as well, or having a sterile eye bath on hand in case of emergencies, it only takes one flicked drip to hit you in the eye and your in trouble!
- Do not drink or eat near the chemicals.
- Keep away from pets and children.
Tools and Materials:
- Running water
- Washing up bowl for wash bath
- Various shallow trays or baths for toner/dye baths
- Gloves, tongs, goggles, apron
- Colorvir Chemicals
- Household ammonia
- Household Vinegar (white distilled vinegar is best)
- Glacial Acetic Acid
- Salt (cheap table salt will do)
- Drying rack or place to set prints out to dry
- Measuring cylinder or jug
- 1 pint bottles for storing the chemicals after use, plastic milk bottles are great.
When you are ready to mix everything up, have your trays and bottles all labeled up with the names of the toners and dyes you are using. This saves on mixups at a later time. I also have a notebook open where I can write down what processes I am using on each print as I do them, I tone multiple prints at one time, so keeping track of what I am doing with them all gets impossible with out it.
Try to minimize cross contamination of baths as much as possible as it really mucks up the chemicals. This is why you should wash a print between each bath. I recommend using a flat plate or tray to carry your print around between washes and baths, it keeps them from dripping into the baths and onto your floor! Once the print has had its last quick 2 minute wash, lay it out on old newspaper to dry for a few hours, hang up negatives. Don’t be tempted to leave your prints in the wash as it will mute and ultimately ruin the toning processes.
Toner and Dye Mixing Tables
It should be noted that Toners affect the blacks and greys of a print, and the dyes affect the whole print or the greys and whites, also that the following mixes will be enough to effect 10 -15 8×10inch toned prints and 20 – 30 dyed ones. Once mixed the chemical have about a 10 day shelf life.
-
Blue toner: Bottle A – 5ml, Bottle C – 2ml, Water – 500ml
Blue toner intensifies an image; use under developed prints.
-
Yellow Toner: Bottle B – 5ml, Bottle C – 2.5ml, Water – 500ml
Yellow toner weakens an image; use over developed prints.
-
Solarization Toner: Bottle D – 10ml, Bottle C – 2.5ml, Water 500ml
This toner will shade dark and light tones in different colours with distinct lines in between, this will become apparent in conjunction with other processes.
-
Sepia/Sulphuration Toner: Bottle G – 2ml, Water – 500ml
This toner will bring out tan/brown/yellow shades.
-
Freezing Grey Toner: Bottle F – 2.5ml, Water – 500ml
Stops light grey areas from being colored.
-
Polychrome Pre-Dye Toner 1: Bottle F – 5ml, Bottle B – 1ml, Bottle C – 2.5ml, Water – 500ml
Gives a pale yellowish color.
-
Polychrome Pre-Dye Toner 2: Bottle B – 2.5ml, Bottle C – 2.5ml, Bottle D – 2.5ml, Water – 500ml
No colour alteration.
-
Polychrome Dyes: Bottle K (red) or Bottle M (blue) or Bottle L (yellow) – 20ml, Vinegar – 25ml, Water – 500ml
Adds vivid Colour to whites and greys.
-
Secondary Dyes: Bottle J(red) or Bottle I(Turquoise) or Bottle H(Violet) – 20ml, Water – 500ml
Adds vivid colour to whole print.
-
Acetic acid bath: Glacial Acetic Acid – 50ml, Water – 500ml
This bath is used to fix dyes to prints.
-
Salt Bath: 25gm of salt, water – 500ml
This bath removes yellow fogging from toned prints and brings out the proper toned image, it wears out quickly so replace it often!
-
Ammonia Bath: Household ammonia – 25ml, Water 500ml
This bath is used to fix a sepia toned image
-
Fix bath: Universal B&W rapid fixer – 125ml, Water – 375ml.
Used to fix toned prints.
- Water/Wash bath: Running/Replenishing water in a deep bath/bowl.
Toner and Dye Processing flowcharts:
When following these charts, remember to wash your print or negative for 30 seconds between each bath, and for 2 minutes at the end of all processes before drying. Do not allow prints to touch or overlap when in the baths.
These charts are also just starting points, you can try out any variable or starting point you want. A general rule of thumb is to tone before dying for the first time, and to always salt bath after a toner and acid bath after all dying is done. But hey, rules are made to be broken!

geschrieben von asharnanae am 2012-04-12 in #Ausrüstung #Anleitungen #lab-rat #tipster #development #b-w #lomography #dye #toner #film-processing #colorvir #solarizor #experimental-coloring


3 Kommentare